Easy Crocheted Boot Cuffs

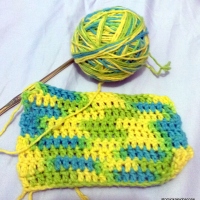
I am making use of my last chunky pink yarn to make this boot cuffs. The yarn is similar to this one :

20140919_225851

The original pattern for this boot cuffs is from Shannon’s blog, but a lil change won’t hurt. Here’s her pattern :

what you’ll need:

yarn of your choicecoordinating crochet hookneedle to stitch in loose ends Pattern CH 40 (or how ever many stitches it takes for your chain to wrap around your leg snuggly in multiples of 3 + 1) row 1: CH 2, DC in first stitch and all stitches across, CH 2 & turnrow 2-7: DC in all stitches, CH 2 & turnrow 8: DC in all stitches, CH 1, turnrow 9: SC in all stitches, CH 1, turn…start of the lacey top…row 10: Starting with the first stitch *(DC, CH 2, DC) in same stitch, skip next 2, repeat from * around. End with a DC in last stitch. CH1 & turnrow 11: Work 4 SC into each of the CH 2 spaces across. Fold boot cuff in half and line up both short ends. SC the ends together, fasten off and weave in ends. Turn cuff right side out.Repeat all steps for second boot cuff.

……and here’s what I did 🙂 I made mine a row shorter and without the turning.

I Chained 37 with my pink yarn :20140921_212559

Row 1: CH 3, DC in first stitch and all stitches across, join in the first stitch.

20140922_185653

Rows 2-9: DC in all stitches, CH 3 & join in the first stitch.20140922_211925

Row 10: Chain 2, SC in all stitches.Join in the first stitch. I changed my yarn to a very nice softer one for the “lacey” top.20140924_220329

…start of the lacey top…

Row 11: Starting with the first stitch *(DC, CH 2, DC) in same stitch, skip next 2, repeat from * around. End with a DC in last stitch. CH 2.20140924_222406

Row 12: Work 4 SC into each of the CH 2 spaces across. Weave in ends.

20140924_224828


Fin. Make the other pair and enjoy!


Posted in Crochet! | Tagged , , , , , , , | Leave a comment

Crocheted Coffee Mug Warmer for Friends!

Wonderful colors for coffee mug warmers isn’t it? I hope this is not too much 🙂

For the COFFEE MUG PATTERN, check this out from : finvara.wordpress.com. The first one is mine 🙂


20140917_11133820140917_11215720140917_11112020140917_11194220140917_111735

Marion’s mug warmer cozy

When i searched through the free mug patterns on ravelry, i
could not find one like i wanted. So i made up my own. This is
my first pattern, i crochet since 7 months. Feel free to correct any
errors or suggest improvements, just leave me a comment. I lost
the paper where i exactly wrote down every step i did, i hope i
did not forget anything here. Pattern fits any standard souvenir
style mugs. My language is german, so please correct my
english if necessary.
● Yarn: choose chunky, soft and pastel colored yarn,
acryl or acryl/wool mixture may be better than cotton
for a stretchy result. I used Schachenmayer SMC Bergen, 2 € per skein,
natural white and rose.
● Hook:  Prym 6 mm or whatever works well with your
own chosen yarn.
● Gauge: not important

  1. R1: Let’s start with a foundation-chain. First, crochet as many chains as you need to fit tightly around your mug. I needed 27 chains. Join with a slipstitch (SL). Be careful not to twist your founcation-chain.
  2. R2: Crochet a round of SC’s in every chain (SC). Join at the end with a slip stich (SL).
  3. R3: Crochet a double chrochet (DC) in every SC. Important: Do not join! Leave a space of 2 chains empty- I had 25 DCs at the end, 2 less than before. Your numbers might be different, just make 2 less than before. You will need this space for the mug-holder. Crochet 2 chains at the end.
  4. R4: Turn your work. Now you work on the other side. Crochet a DC in every SC. Important: Do not join! Crochet 2 Chains at the end.
  5. Repeat step round 3 + step round 4 until you reach your desired height. Take a look at my photo for orientation.  Not too high! Leave some space.
  6. Adding the buttonhole: When you reach the end of your last row, add 12 chains (other kind of yarn may require more or less chains, just check that). Make a loop with a slipstitch(SL) into the 7th chain (create a circle).
  7. Decorative border: you do not need a border, but it looks so nice and clean. Choose a nice matching color for adding a border. I chrocheted Sc’s in every DC, but for the Button-Holder and at the bottom in the middle of the hole i used slip-stitches. Add a nice button. Wooden buttons always look great.
  8. And, pleaaaaase show me your result!

Design and copyright by http://www.marionhassold

Posted in Crafty me :-D, Crochet!, My Beloved Philippines, Random post! | Tagged , , , , , , | 1 Comment

MISTER KABAB

My mom and I had lunch at the Fisher’s Mall branch of Mister Kabab in Quezon City. The place is clean, cozy and it got filled up during lunch time. Must be popular.

We ordered flafel for appetizer and it was ok though the hummus is salty. The pita bread is just one piece, good enough for ladies to share.

20140921_131258

20140921_131314

20140921_131247

My mom ordered Abgousht with rice. The sauce is rich and good BUT still too salty for anyone.

20140921_131322

I ordered Chelo Kabab, is also a lil bit salty and they gave the mistake of serving just one piece of it. They gave it back with one piece of the Kabab cold and the other warm…..oh well.

20140921_131600

The service is terrible from order taking to delivery to getting the bill. It is just 4 staff in a room with 10+ tables.

The price is reasonable but I won’t be back again.

Posted in LET'S DINE OUT!, Musings about LIFE, My Beloved Philippines, Photo Challenge, Quotes in pics, Random post!, Travels | Tagged , , , , , , , , , | 3 Comments

Crocheted Leg Warmers : Cool and Easy!

I always wanted to make good use of my bulky, chunky yarn. Something quite memorable and useful. Since, winter is fast approaching, here’s what I came up to : LEG WARMERS! My pattern came from this link but with just a few modifications :

how-to-crochet-a-pair-of-leg-warmers–craft-17504

Okay, let us begin.

CROCHET A LEG WARMER:

Here is the cool, chunky yarn.

20140919_225851

 1. Begin with a slip knot on your hook. I chained 39 stitches (or any multiple of 3 ) that fits my leg. Join the chain to form a circle, by slip stitching into the first stitch. Careful not to twist the chain.

 20140919_225825

2. Chain 3, then work 2 DC into the same stitch.

20140919_231028

3. Skip 2 stitches and work 3 DC into the next stitch. Repeat *sk 2 st, [3DC] * until you reached the last stitch. Join with a slip stitch into the top ch of the beginning chain 3.

20140920_192644

4. Chain 3 then work 2 DC into the space between the two DC clusters from the previous round, directly below your chain stitches. Work 3 DC into the next space. Go around working 3DC clusters into the spaces. Join with a slip stitch into the top ch of your beginning chain 3.20140919_210034 20140919_210113

5.Repeat step 3 until you have made your desired length of rows of 3DC clusters. I reached 14 rows for my leg warmer.

 6. Chain 3, then work 1DC stitch into each dc stitch around, through the back loops only. Join with a slip stitch into the top ch of your beginning chain 3.

20140919_210124

7.Repeat step 6 two more times.

20140919_225537


8.Secure ends using your darning needle.

9.Make the second leg warmer, by repeating steps 1 till 8.

20140921_212034I will have fun and enjoy it when winter comes 🙂 !


Posted in Crafty me :-D, Crochet!, My Beloved Philippines | Tagged , , , , , | Leave a comment

ENDURANCE : Weekly PhotoChallenge

ENDURANCE : The Weekly PhotoChallenge


20140627_133629 (2)-001

endurance

It has been a long journey for this year, endurance wise….physically, mentally and emotionally. I was diagnosed with leukemia early this year. After three months of chemotheraphy, two months of recovery period, I was subjected to a  Stem Cell Transplant for further success. So far, so good 🙂 ….and I thank heavens for that! I leave you with this fridge magnet note my friends gave me. I hope and pray that whoever is battling cancer now will also have the endurance, strength and hope that we can contain.

C’est La Vie!!


Posted in Daily Prompt, Musings about LIFE, My Beloved Philippines, Photo Challenge, Quotes in pics, Random post! | Tagged , , , , , , , , , , , , | 9 Comments

CROCHETED COTTON SLING BAG!

It is true that “necessity is the mother of invention”. I keep reminding my hubby to bring my sling bag from home but he keeps on forgetting….oh well. So, out of necessity here is what I finished lately.

The idea of happy rainbow colors passed my mind lately and came up with this pattern :

crocheted bag in the making

The body of the bag

bottom part of bag

The bottom

body of the bag

another shot of the bag’s body

After a couple of weeks, and hundreds of double crochets here is the finished bag :

And it's finished

And it’s finished

I followed the pattern from this link :  CROCHET DROPS BAG by Garnstudio.Com. As for this bag, I did modified my yarn, so it’s up to you to adjust yours.


Materials:

DROPS 132-20
DROPS design: Pattern no DE-073
Yarn group A and B
——————————————————–
Height: approx. 40 cm / 15 3/4”
Width: approx. 38 cm / 15”

Materials: DROPS DELIGHT from Garnstudio
100 g color no 05, beige/gray/pink mix
100 g color no 07, beige/blue mix
100 g color no 08, green/beige mix

And use: DROPS COTTON LIGHT from Garnstudio
200 g colour no 21, light beige

DROPS CROCHET HOOK size 5 mm / H/8 – or size needed to get 13 hdc with 1 strand in each color/material (= 4 strands) = width 10 cm / 4”.

DROPS MOTHER-OF-PEARL BUTTON, NO 540 (34 mm): 1 piece

NOTE: This pattern is written in American English. All measurements in charts are in cm. For conversion from cm to inch – click here. There are different terms for crocheting in British and American English. If this pattern includes crochet, click for “crochet terms” here. For this pattern in British English, please click here.

WORK IN THE ROUND IN A CIRCLE:
After last hdc on the round, continue to next round with 1 hdc in next st (= first st on next round). NOTE: Insert a marker at the beg of round between last st and first st on the round, move the marker upwards.

——————————————————–

BAG:
Worked in the round from bottom up. With hook size 5 mm / H/8 and with 1 strand in each color/material (= 4 strands) ch 2 .
ROUND 1: Work 10 hdc in 1st ch – Read WORK IN THE ROUND IN A CIRCLE above.
ROUND 2: 2 hdc in every st = 20 hdc (10 new sts).
ROUND 3: * 1 hdc in next st, 2 hdc in next st *, repeat from *-* the rest of the round = 30 hdc.
ROUND 4: * 1 hdc in the next 2 sts, 2 hdc in next st *, repeat from *-* the rest of the round = 40 hdc.
Continue to inc 10 sts on each round by working 2 hdc in next st after every 3rd, 4th, 5th st etc. until 100 sts have been worked on the round. Continue with 1 hdc in every st until piece measures 40 cm / 15 3/4” vertically (or desired height).
Do not cut the strands.

SHOULDER STRAP:
Turn piece, ch 2 and work 1 hdc in each of the next 7 sts = 7 hdc. Turn piece with 2 ch and work 7 hdc on the row back and forth until shoulder strap measures 80 cm / 31”, cut the strands. Fasten strap in the other side of bag.

FLAP:
With 1 strand in each color/material (= 4 strands) work 7 hdc on the upper edge (between shoulder strap). Turn piece with 2 ch and work 7 hdc back and forth on the row until flap measures 6 cm / 2½”. Then work button hole as follows: 2 hdc, ch 3 and skip 3 sts, finish with 2 hdc. On next row, work 1 hdc in each ch from previous row. Continue with 7 hdc for another 2 cm / 3/4”. Fasten off.
Sew button on to bag.

Another pattern link is here from knittingandsomemore

Have fun!


Posted in Crafty me :-D, Crochet!, My Beloved Philippines | Tagged , , , , , , , , | 2 Comments

Praying for others

image

Posted in Quotes in pics, Random post! | Tagged , , , | Leave a comment

Calm Your Mind

image

Posted in Quotes in pics, Random post! | Tagged , , , | Leave a comment

Out of the blue crocheting today !

POTHOLDERS:

20140928_055900


20140928_174903

20140928_182350

Posted in Crochet!, Random post! | Tagged , , , , , | 4 Comments

Positivity

image

Posted in Musings about LIFE | Leave a comment

C’s

image

Posted in Musings about LIFE | Leave a comment

#Book

image

Posted in Musings about LIFE | Leave a comment

Courage!

image

Posted in Musings about LIFE | 1 Comment

Gratitude

image

Posted in Musings about LIFE | Leave a comment

FEEL GOOD!

image

Posted in Musings about LIFE, Random post! | Tagged , , , , , | Leave a comment